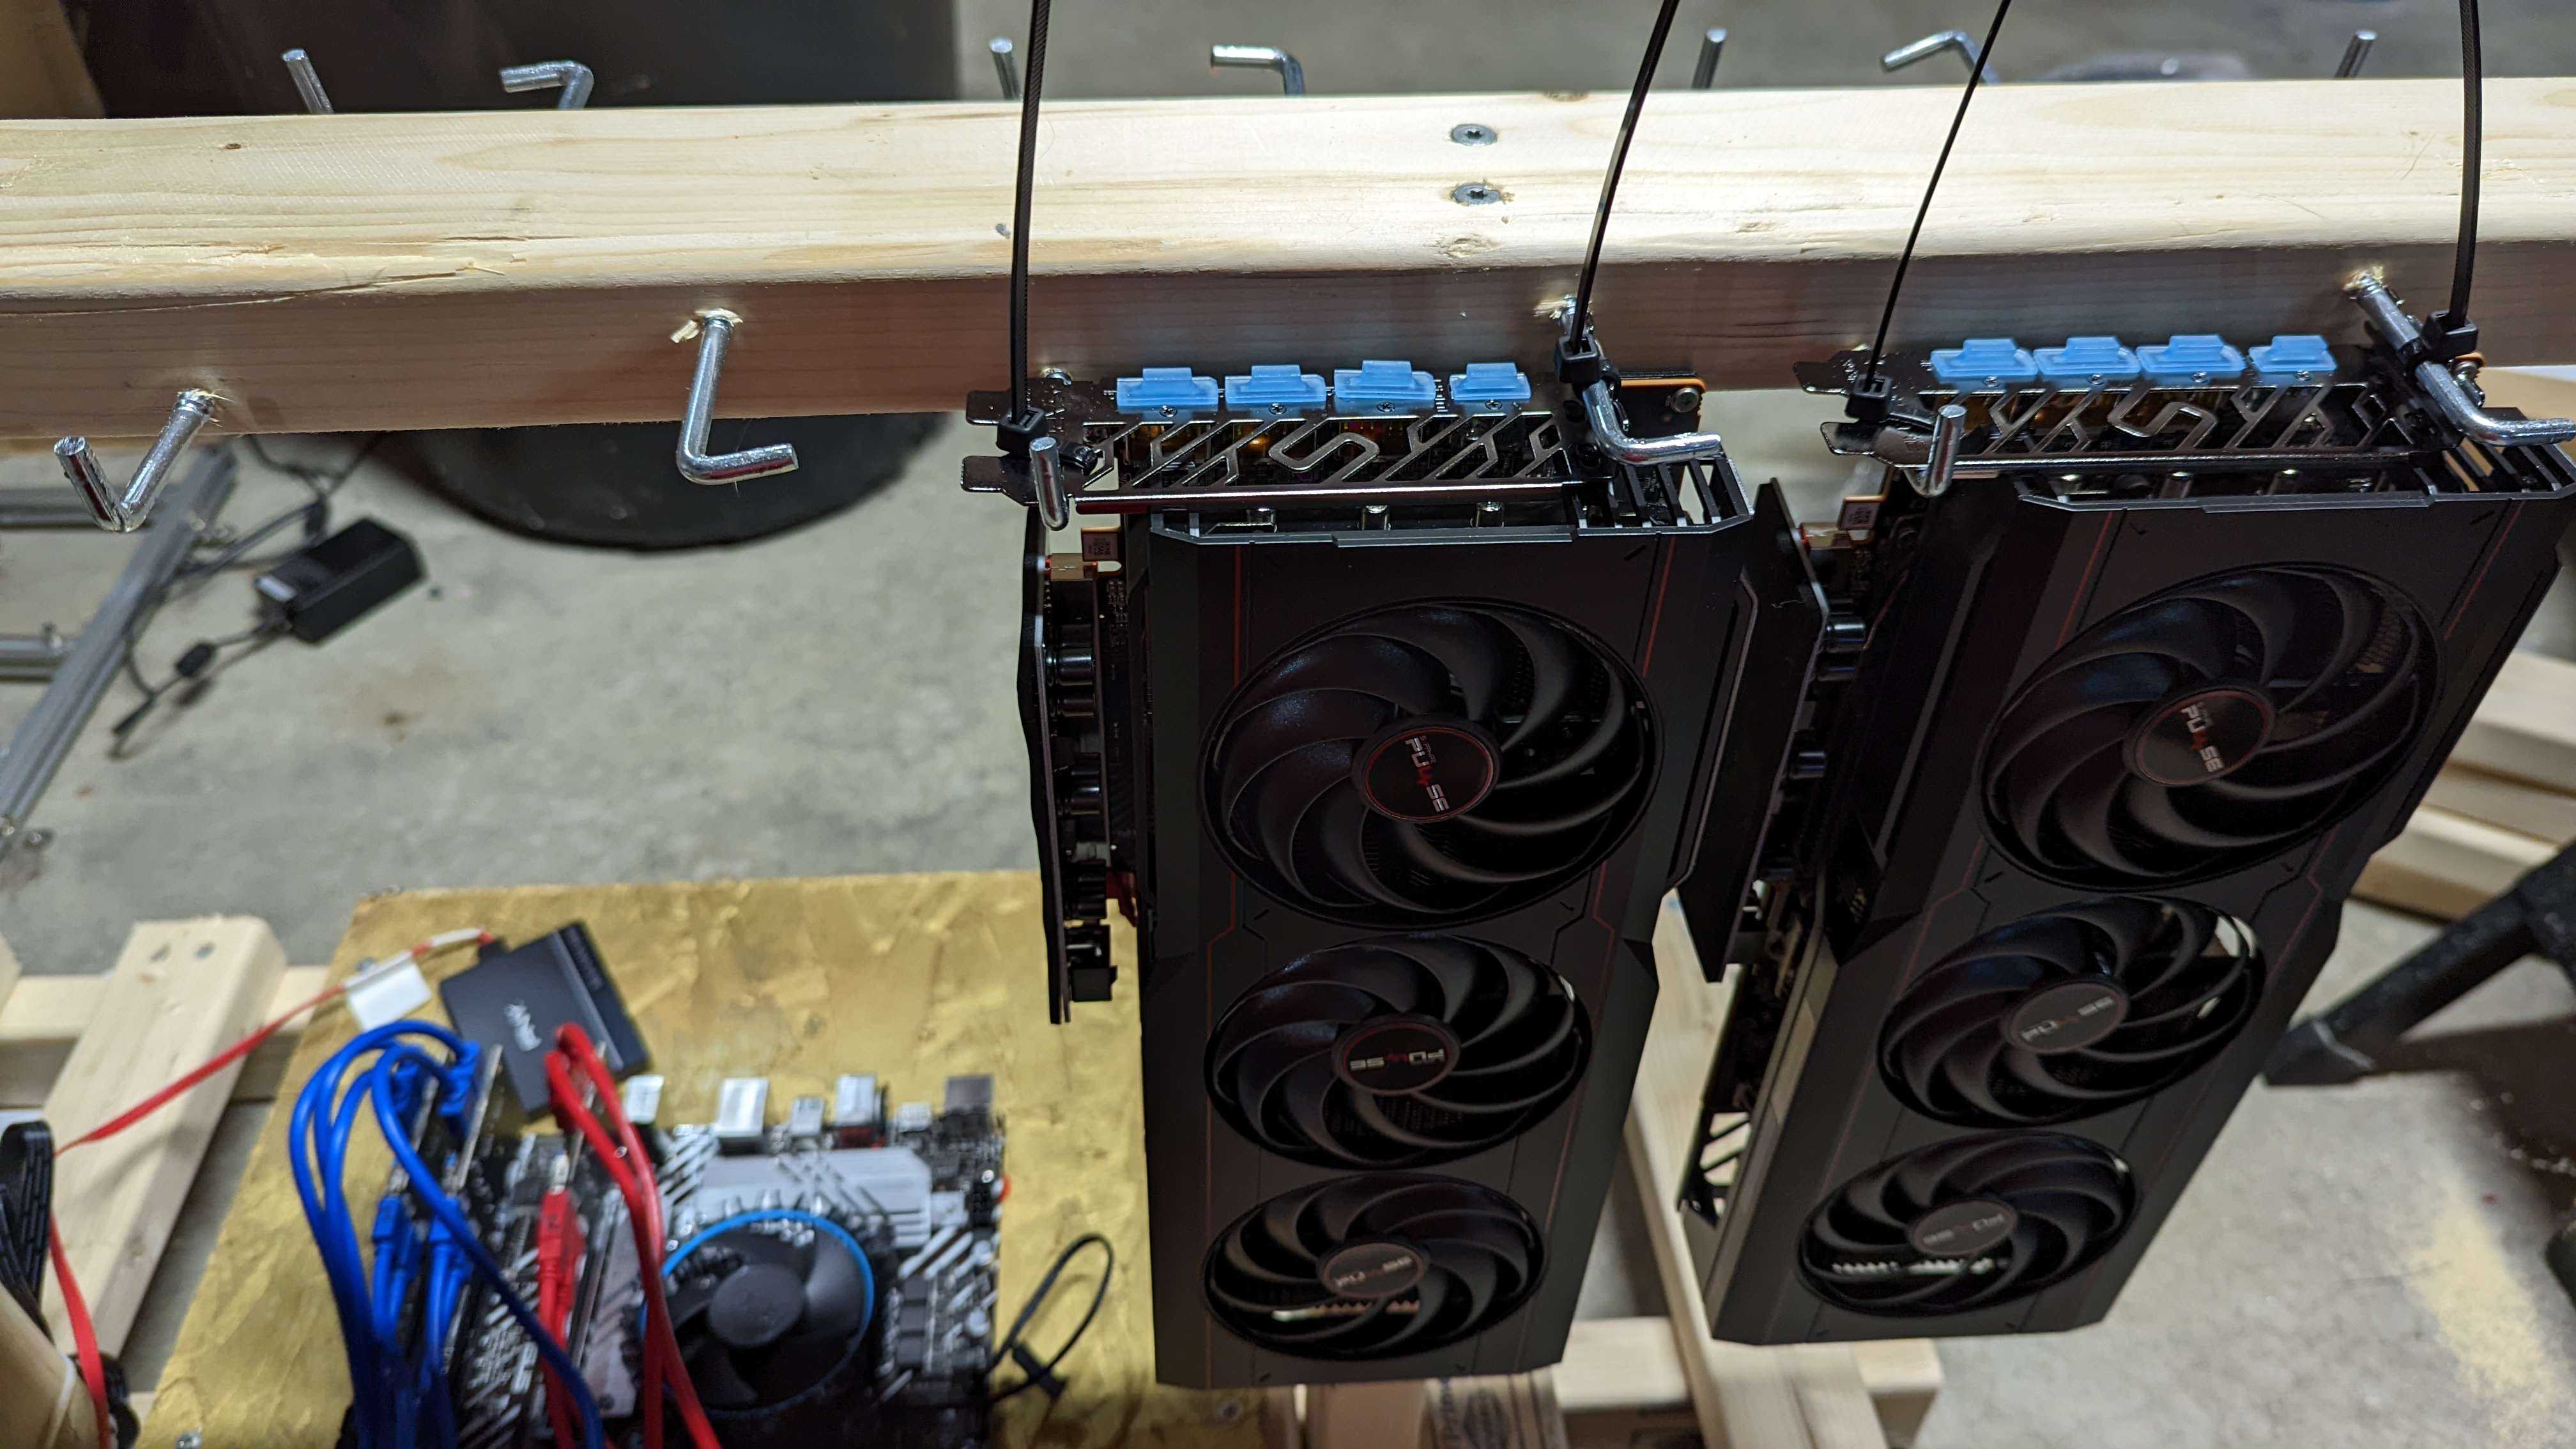
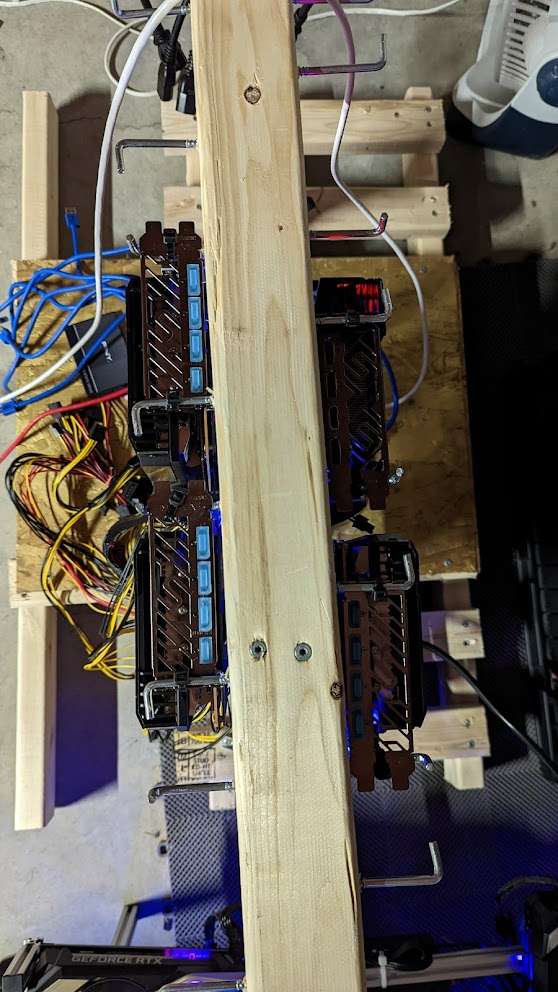
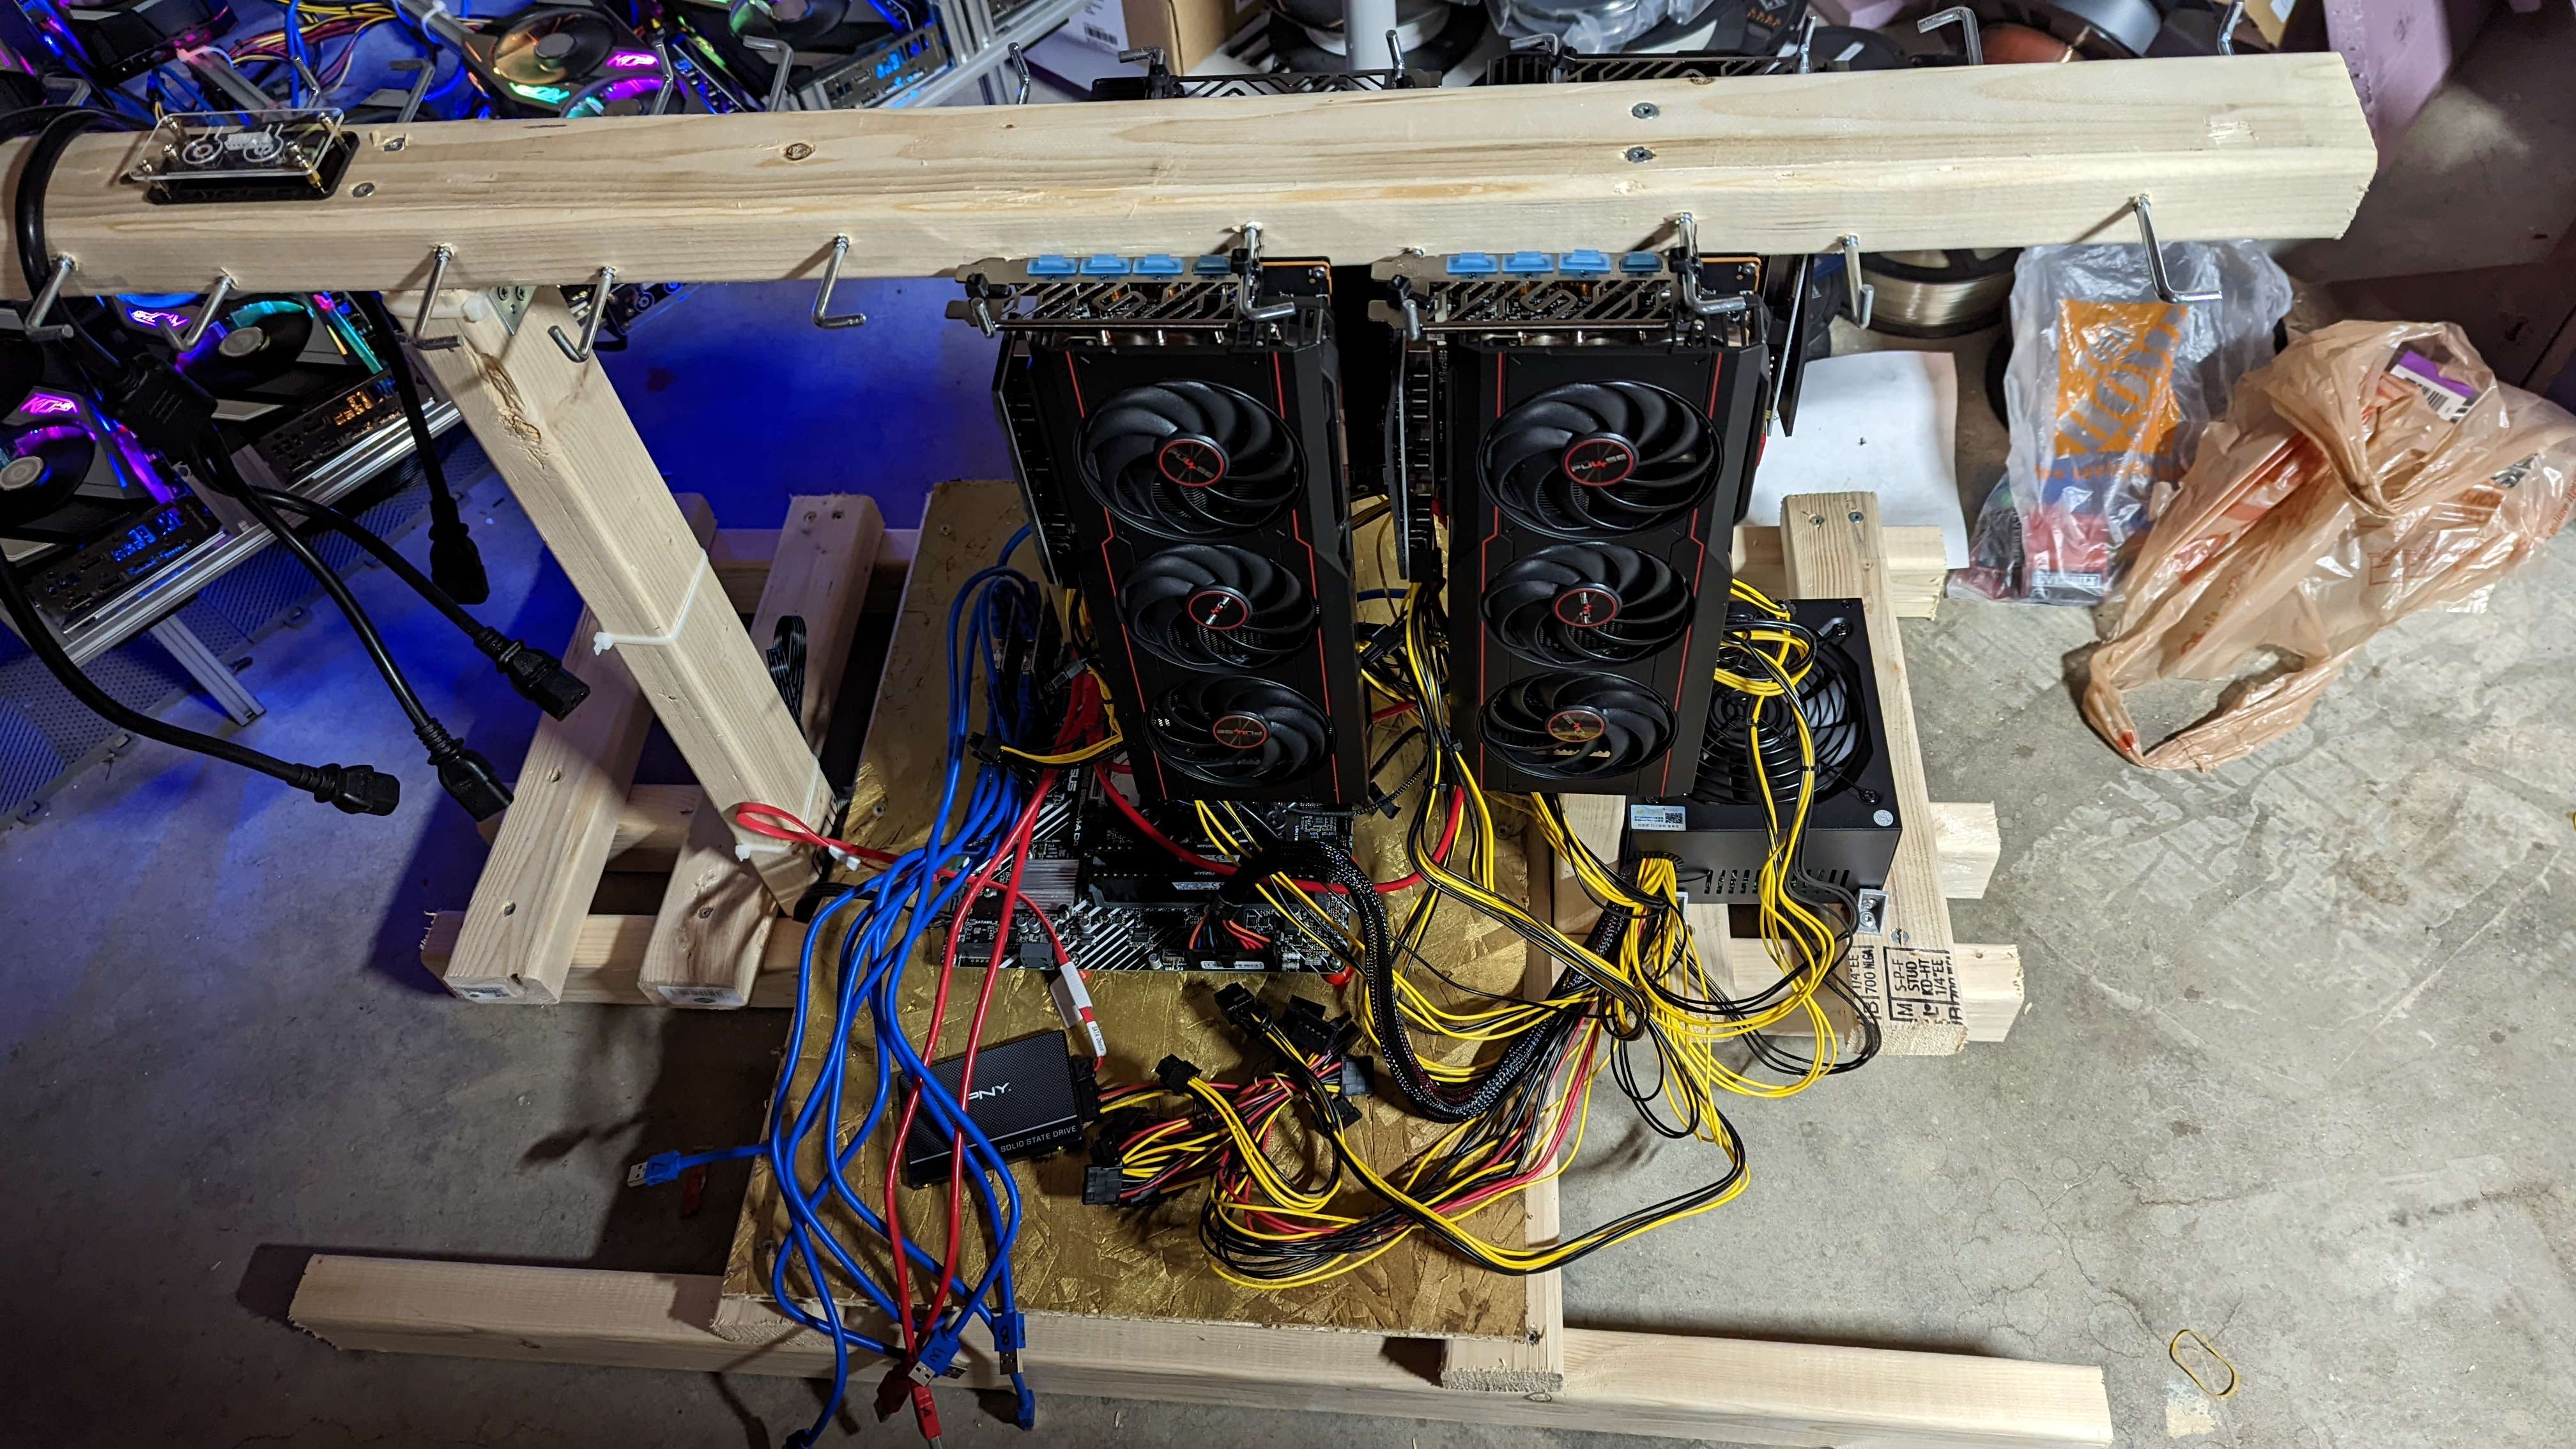
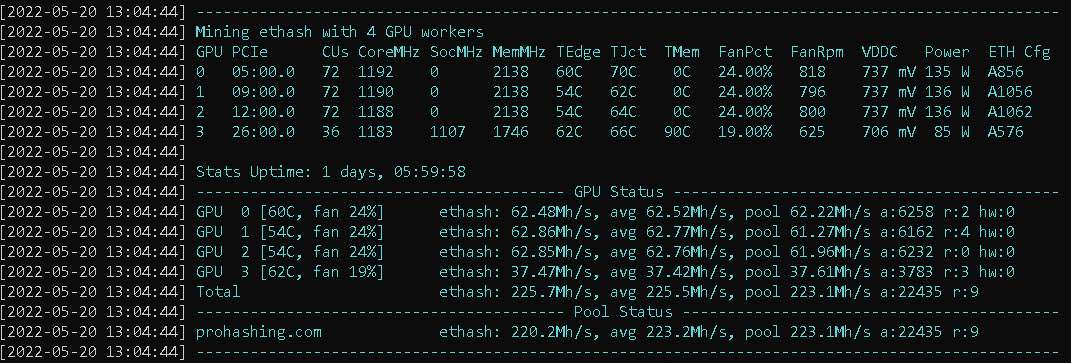
Adventures in frame making
Posted: Sat Apr 23, 2022 12:01 am
While doing some research on mining efficiency (power in my area is $0.19/Kwh) I was reading about one of the benefits of reducing power usage, was lower temps, which mean my GPUs would last longer. So I look at quick look at my rig, and honestly I don’t push it too hard right now, with all my temps normally under 70 - 75.
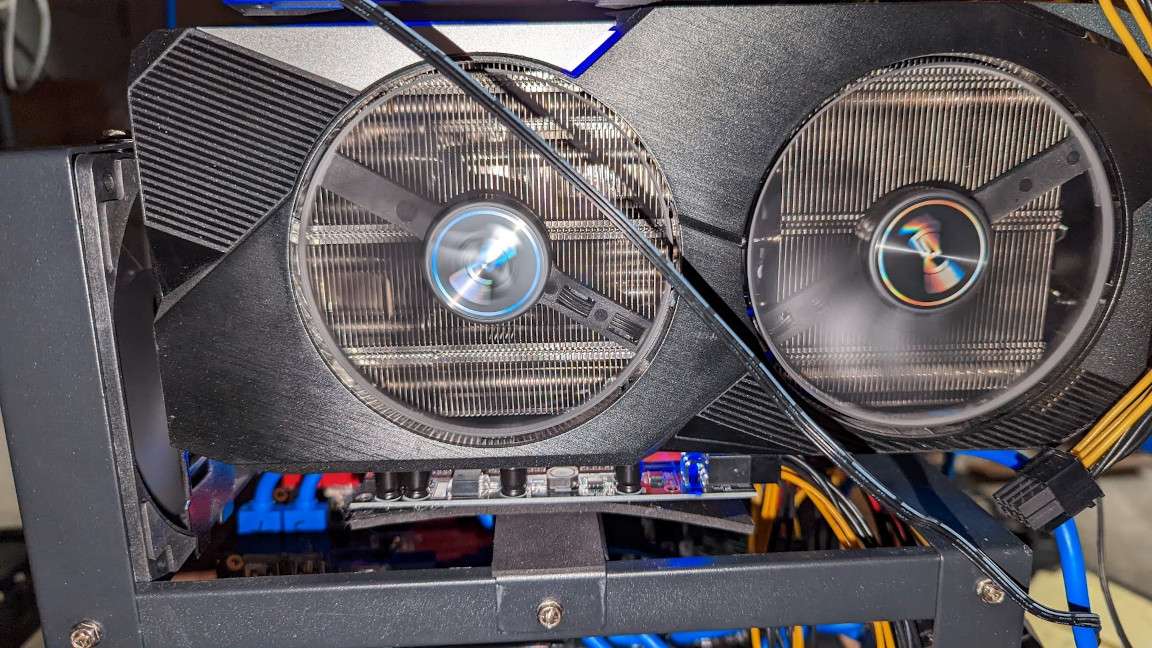
Looking at my current rig it was a pretty standard 8-card rig open air rig. But it got me thinking about the design, as there are four large fans at the “face” of the GPUs. However looking closely at my GPUs (ASUS 3060 TI KO V2’s) the fins of the heat sink were arranged along the short “top to bottom” arrangement.
![Image]()
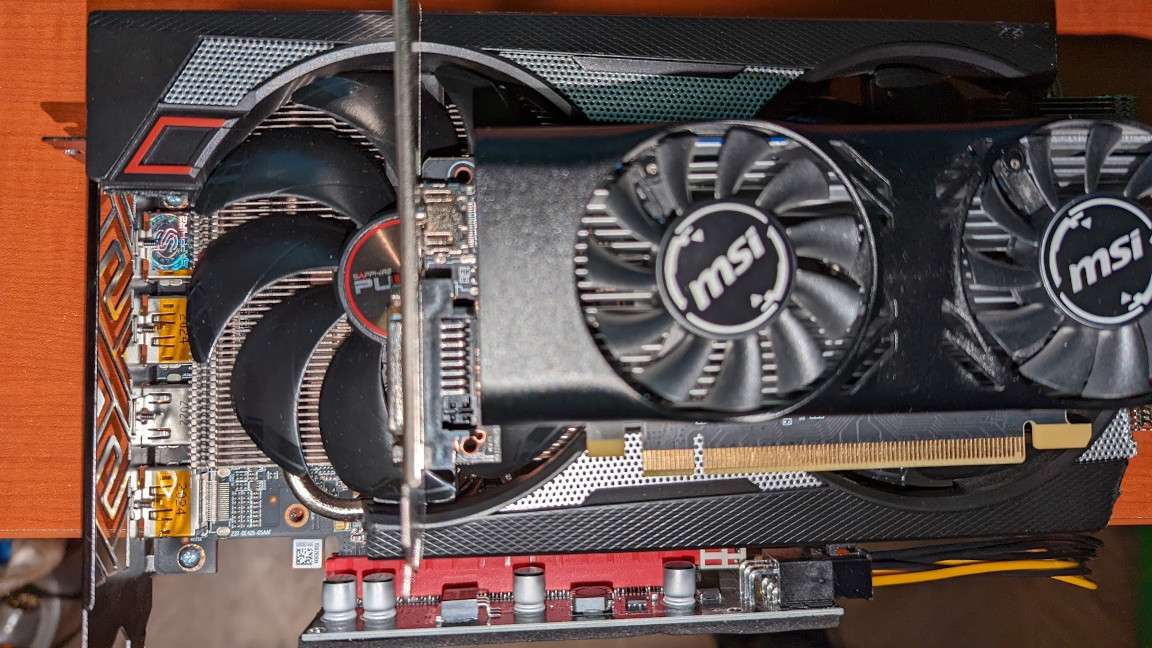
So in this arrangement the fan at the face would just be pushing air against the first fin face and not “through” the card. This is not always the case with every card, on an AMD card and a 1650 I have they are “front to back”, so the fan placement would allow for the air to flow all the way through from the face fans.
![Image]()
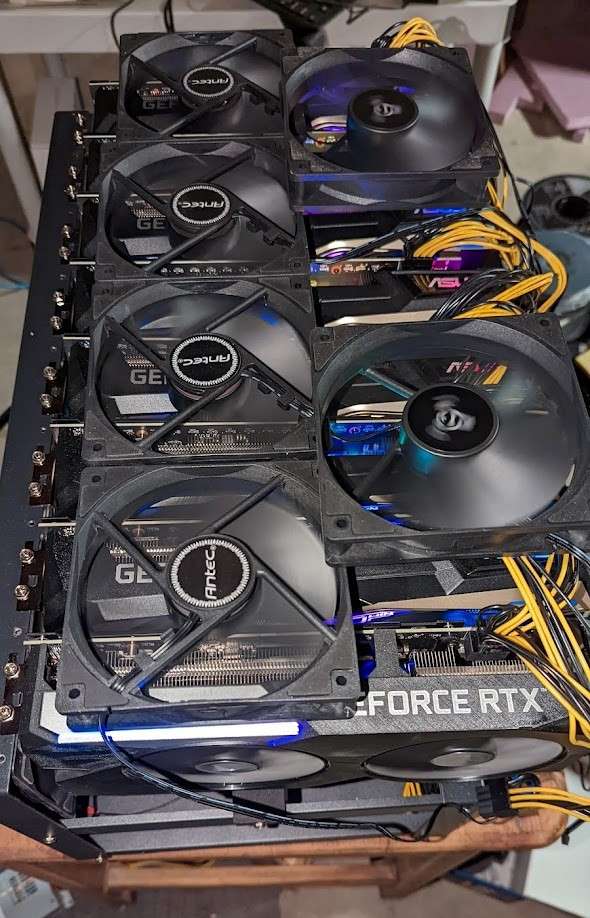
So my first change was simply to move the fans from the face, and just lay them on the top of the cards, and this dropped all the temps quite a bit, and they were running around the low 60’s.
![Image]()
As a tip to people out there with rigs, check your cards, and fan placement, and make sure the air is really flowing along the fins, not against them. Perhaps this is obvious, but I really had not even thought about it till then.
But one thing caught my eye with this, one card was only 39, and only had a fan of 50%. The others were all in the 60 range, with rans running between 60% and 80%. This was not an anomaly, looking at the numbers over a few days after the change, that one card was always much lower than the rest.
After looking at the rig, and doing some tests to confirm, it was obvious that the coolest one was the one at the end, where the stock fans could easily push the air out to the open. The others all get some back-pressure from trying to blow into the card beside them.
![Image]()
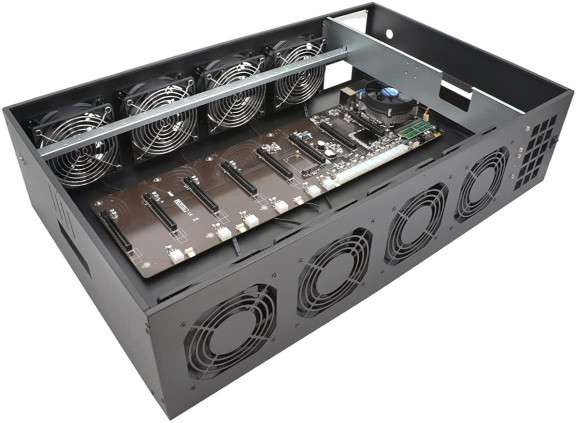
So, I started looking for better options for the mining rig. One thing I kind of liked was the “server rack” style. An enclosed case (reduce dust) with fans that pull the air across the cards. However, in my opinion this had a similar issue with the air flow trying to be along the length, which was not the best for these cards.
![Image]()
So looking at other options, they were all efforts to spread the cards out more. Either by going wider, or trying to go to two tiers.
![Image]()
![Image]()
These would be better, but you would still get some back pressure, the fans were still in the wrong place, and these get EXPENSIVE. Also, if I was going to change the rig I wanted to increase my capacity to handle 12 GPUs, in which case I would back to a similar density as my current situation.
So that is when I decided to do the only rational thing somebody with questionable reasoning skills could come up with… spend more on building my own crazy contraption!
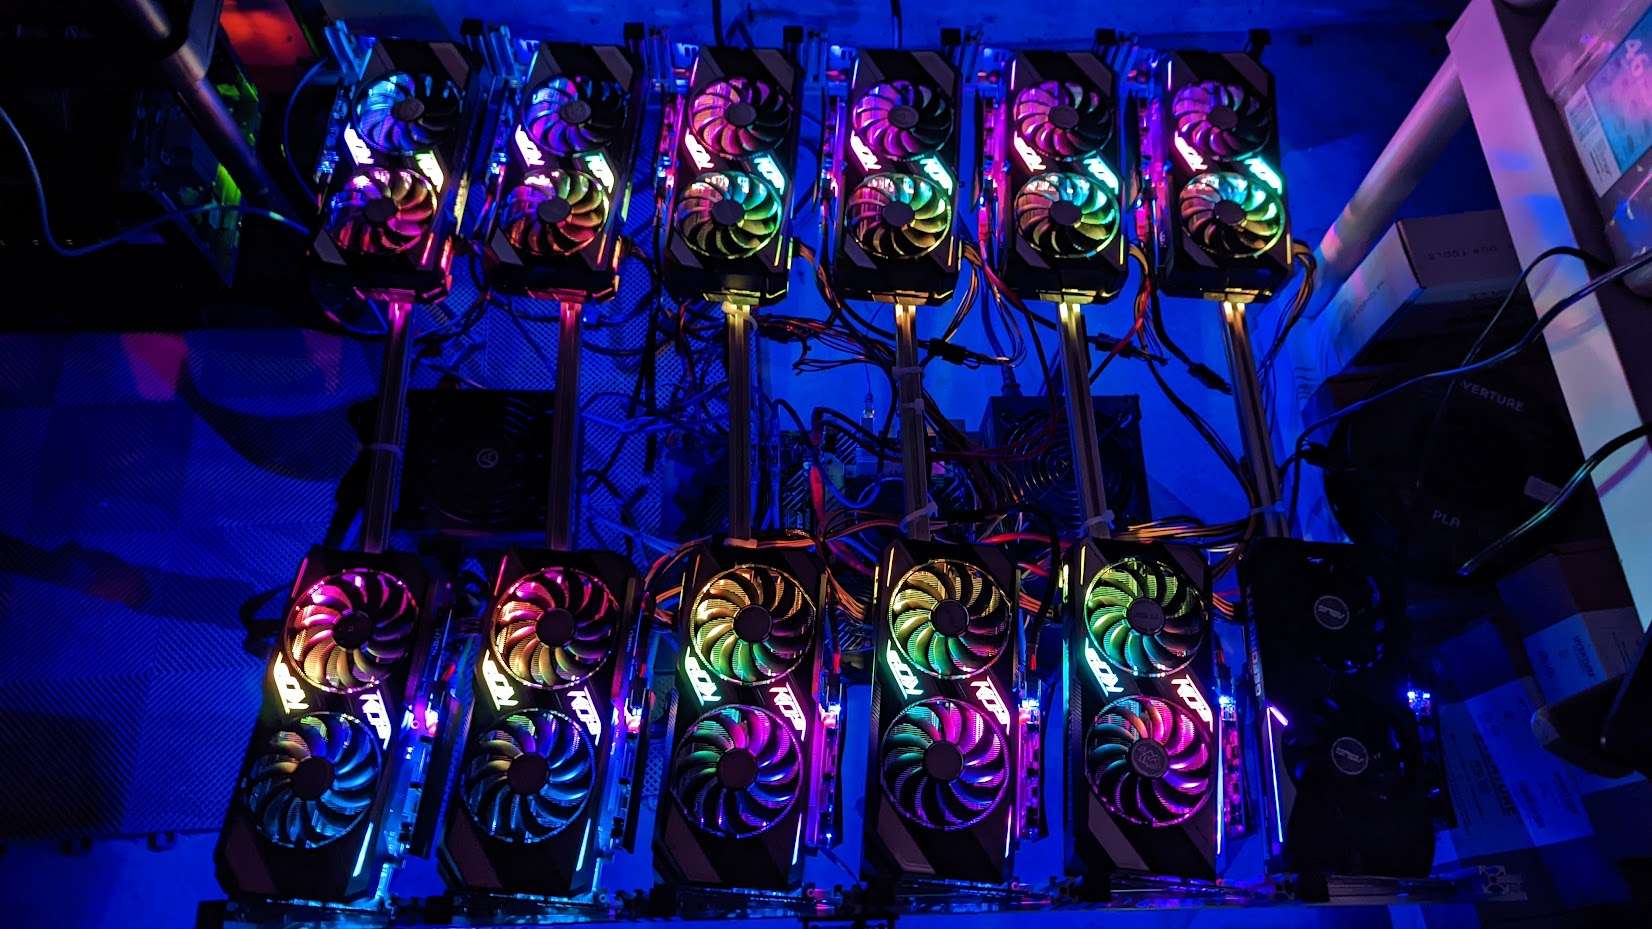
Behold, the “fire pit”!
...as I have decided to call it!
![Image]()
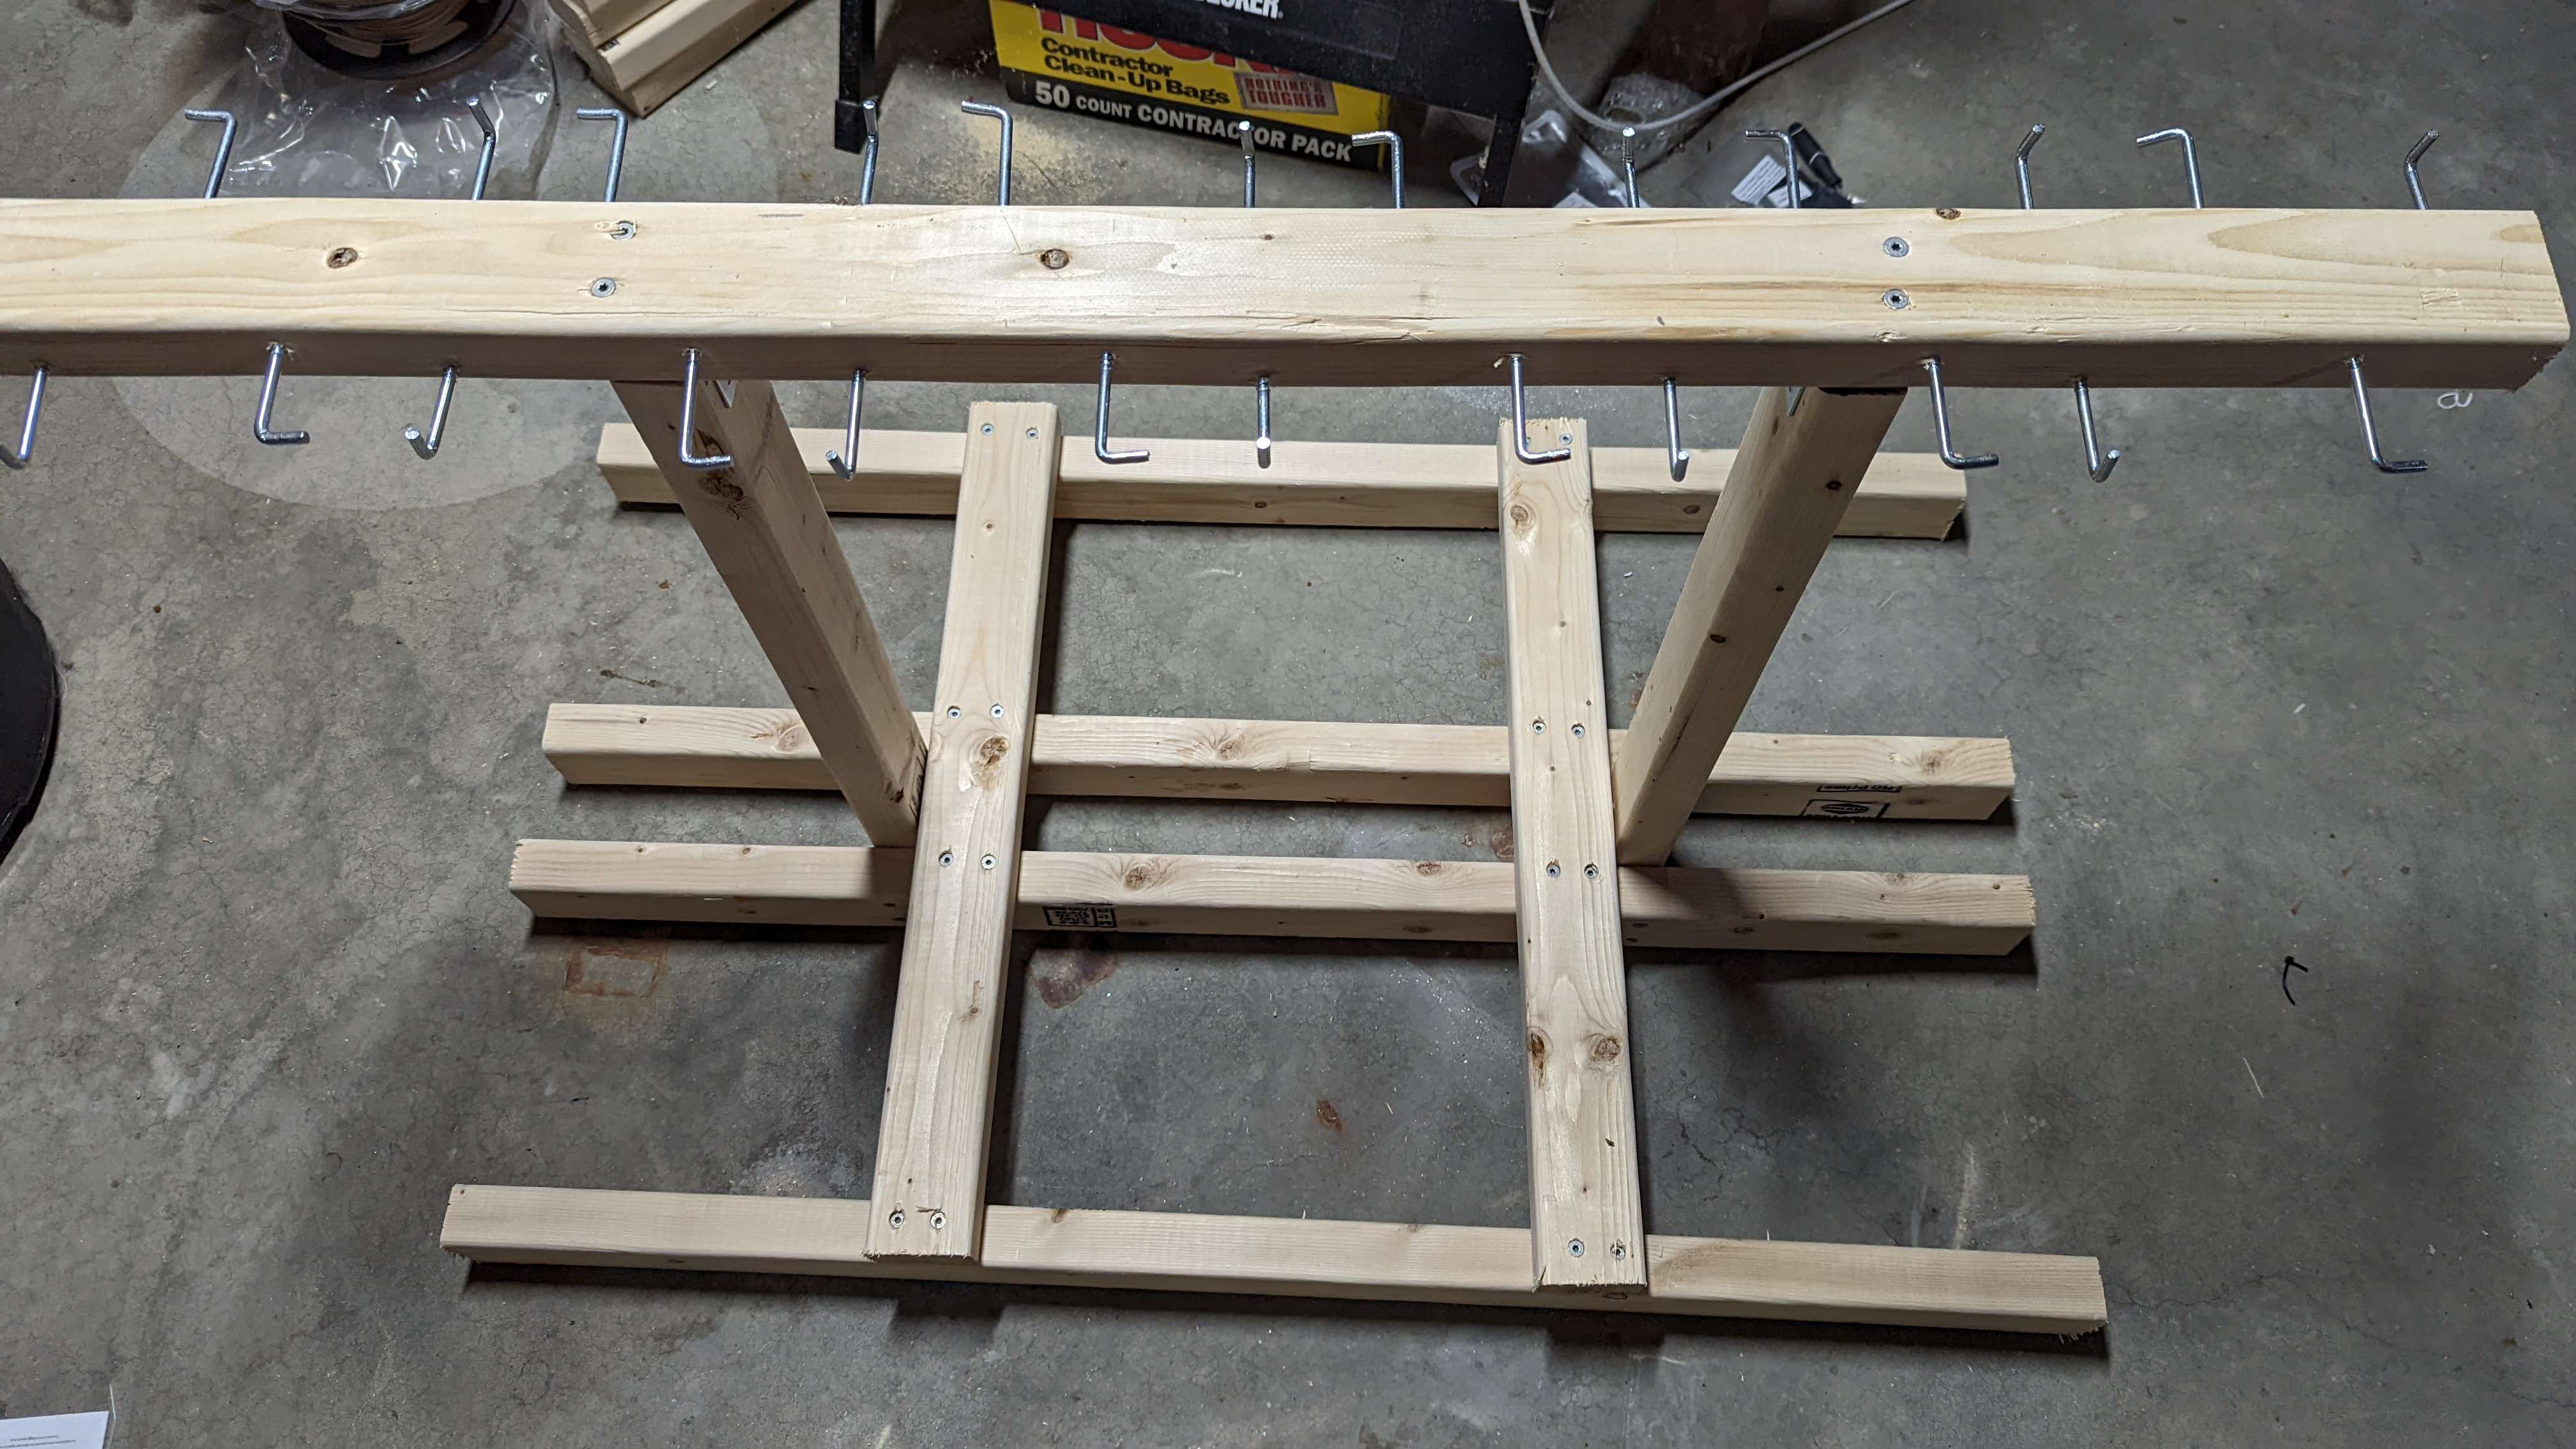
This thing is ridiculously huge at 39” X 33” X 11” (100cm X 84cm X 28cm). It is made of 2020 aluminum extrusion, so it also weighs a significant amount. But it is pretty rugged.
There is a lower level to hold the motherboard tray, which is the first thing I worked on. I wanted to make sure there was room for a second PSU to handle the additional GPUs I will (eventually) be adding. I also wanted the space to make sure the fans from the PSU and CPU had free airflow as well. So the motherboard was placed “centrally” under the cards, hence it on a lower level.
![Image]()
Now the GPUs are going to lay flat on each of the cross beams. This means the fans are pointing straight up, where heat apparently likes to go normally. This allows the stock fans to breath naturally. As a side benefit, by laying the backs on the 2020 aluminum it acts as a heat sink for the back of the cards, drawing heat away from the backs.
![Image]()
You can see at the end is space for 4 more cards, yet to be purchased, but nice to have the room.
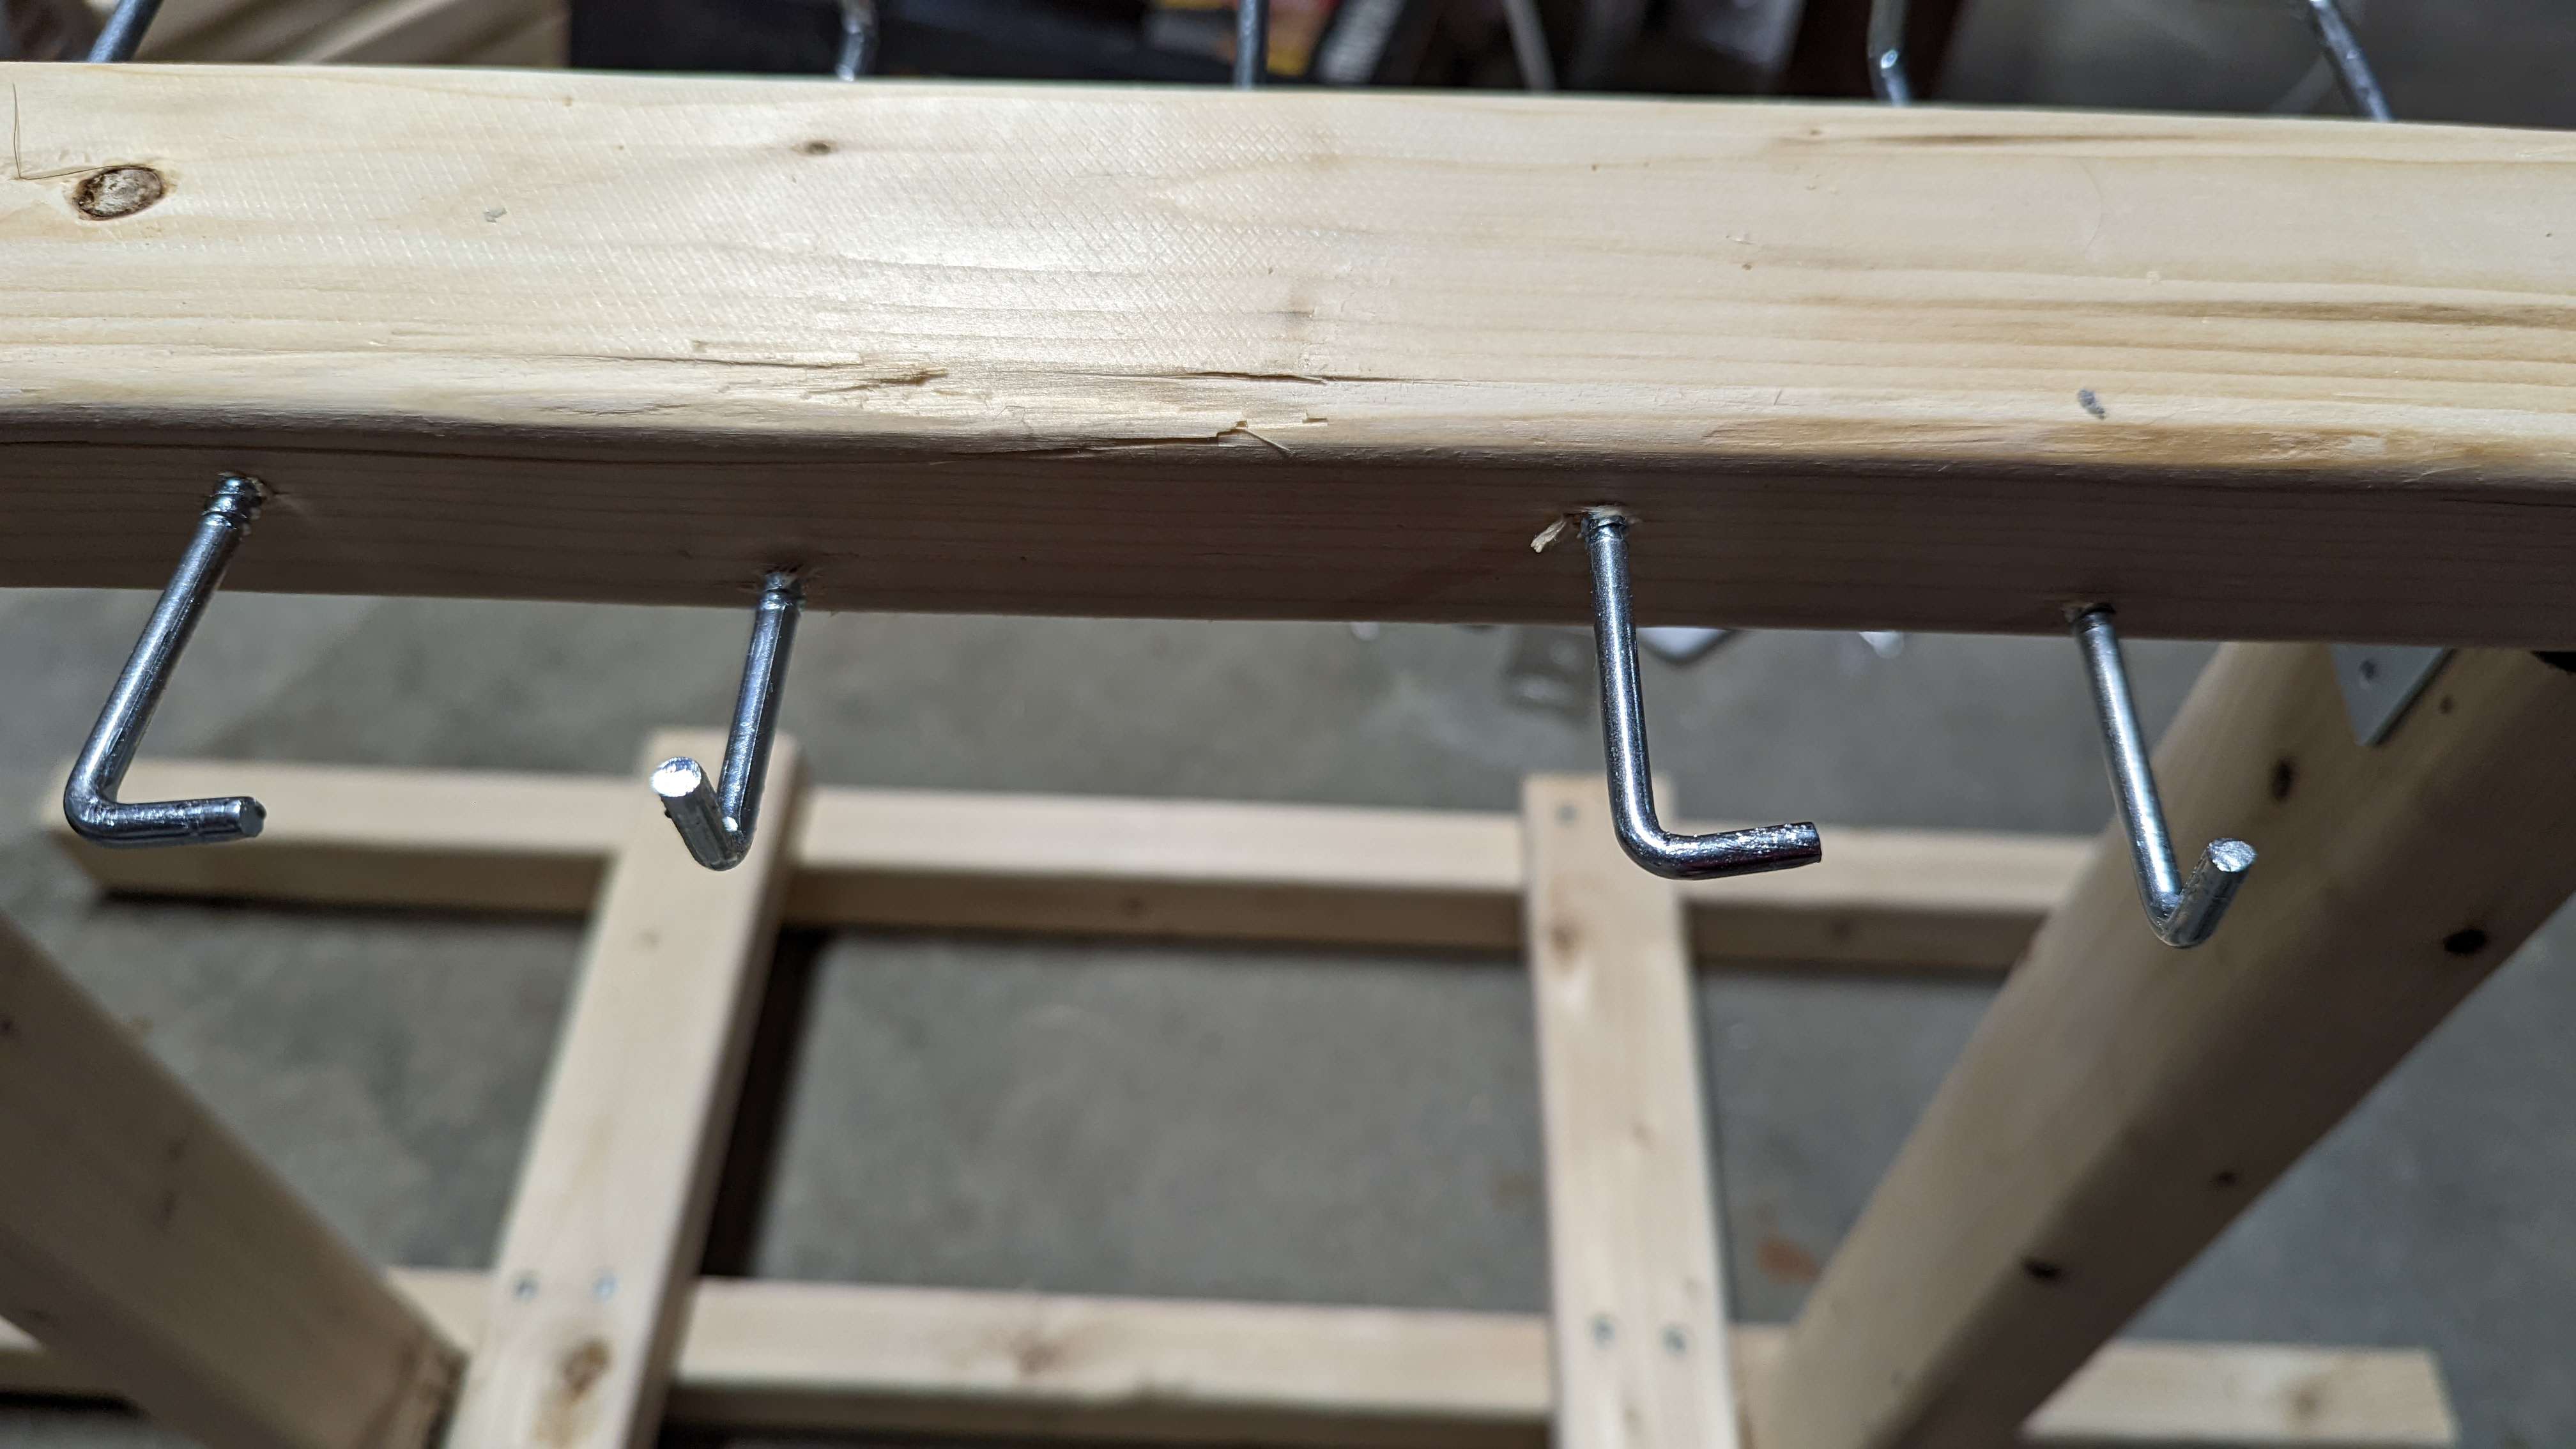
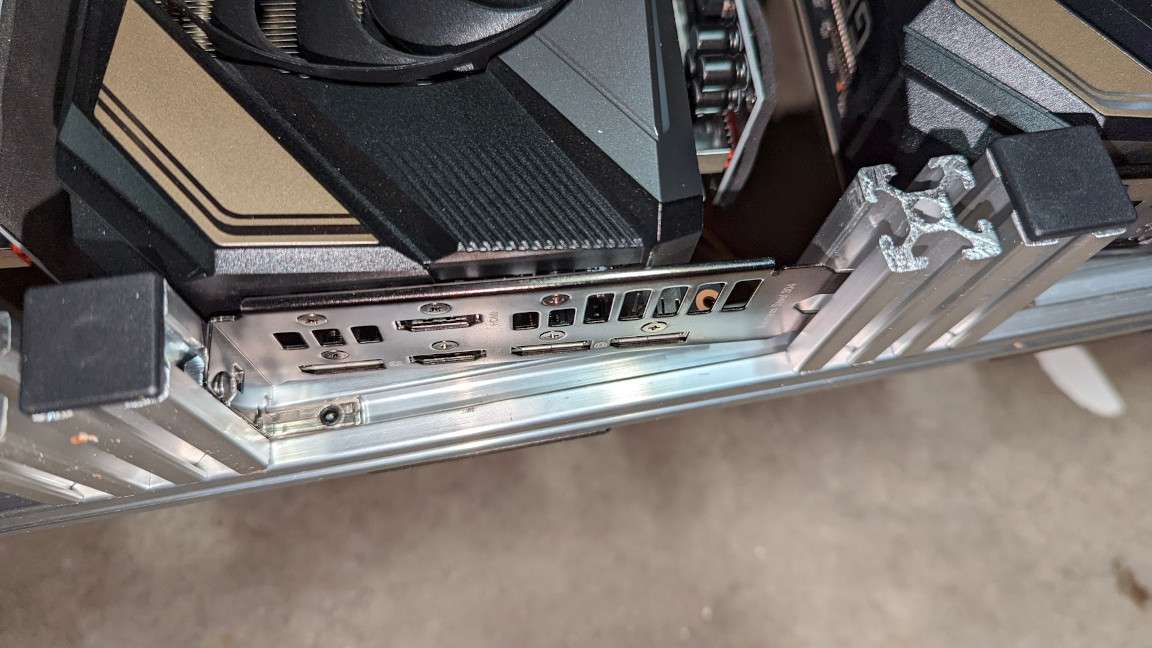
Each card is held in by the bracket, I just used two stubs of 2020 to hold them in. Worked really well to hold them in place.
![Image]()
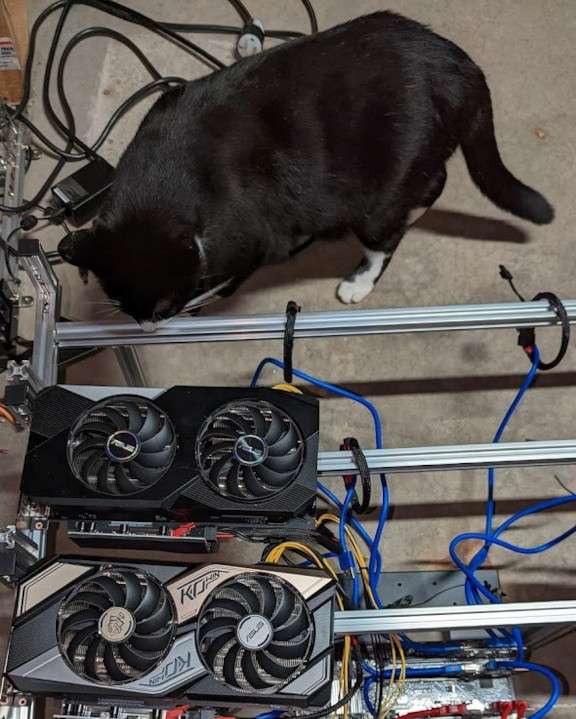
Before finishing I had all the wires professionally inspected, this is very important!
![Image]()
The results...
So, now the important part, the results were pretty amazing. Using exactly the same overclocking, every card is now at or under 55 degrees, and all the fans are running at 53% to 55%. I may play with some higher clock speeds later now they are running so much cooler.
![Image]()
I should also mention that the new configuration uses none of the fans that were on top or at the front of the old rig, so I am saving quite a bit of power on removing the 10 fans that I had, and still running cooler than before! Plus the fans on the cards themselves are not running as hard, so the efficiency of the cards has also improved. Originally they were averaging 400 to 405 KH/w, where as now I am up to 420 to 425w, about 5% per card with no overclocking changes.
Oh, and the reason for calling it the fire pit… it glows and gives off (some) heat… she is a pretty one!
![Image]()
My final summary….
I had a good time building this thing. I probably could have made it more compact, but I like the spacing, and it gives me the option to use longer GPUs if I want in the future.
I am lucky enough that I have space in the corner of my basement to keep it, without it getting into too much of my way.
I spent $217 on the materials for the frame, I could probably have picked some cheaper parts, but I tend to overengineer. This is quite a bit more than some of the cheap open frames, but they are quite fragile, where this thing is a tank. It is however cheaper than the server case style, though that comes with a special motherboard.
In full disclosure I did also spend an additional $126 on “unnecessary” items, like end caps, extra cables, and things to be ready for adding the next PSU. But I didn’t include them in the $217 above because it was not part of the like-for-like replacement.
Now I know many people will say that running in the low and sub 60s I probably didn’t need to do all this, and they are probably right, Ceteris Paribus. However, I justify in two ways.
First, there was no way I was going to get the four new GPUs on my old rig, so I needed to do something. Building a second rig was possibly an option, but then your wasting energy with a second MB setup, when what I had already had capacity that was unused.
Second, with Ethash (eventually) moving away from POW, I am going to have to find other algos to mine. If they are GPU intensive then that could require higher power, clocks, and therefor more heat generation. My old rig would have started to heat up in that situation. Also if I try to do some dual mining on these, to use some of the same underutilized resources, I may need that extra heat dissipation sooner rather than later.
So in both ways I feel this new rig future proofs me, so for me, in my situation, I feel it was a good choice…. Excessive.. but good.
What’s next?
As I mentioned, with this cooler running, I may try to tweak some overclocking to see if I can get more out of it without dropping efficiency.
I am also planning on switching to Linux so I can try dual mining. Since these are 8GB cards I can’t do a lot of the dual mining on windows which require a minimum of 10GB cards.
And as I mentioned, try getting 4 more cards to fully populate it. With GPU costs coming down, now might be a good time to see what I can get.
Looking at my current rig it was a pretty standard 8-card rig open air rig. But it got me thinking about the design, as there are four large fans at the “face” of the GPUs. However looking closely at my GPUs (ASUS 3060 TI KO V2’s) the fins of the heat sink were arranged along the short “top to bottom” arrangement.
So in this arrangement the fan at the face would just be pushing air against the first fin face and not “through” the card. This is not always the case with every card, on an AMD card and a 1650 I have they are “front to back”, so the fan placement would allow for the air to flow all the way through from the face fans.
So my first change was simply to move the fans from the face, and just lay them on the top of the cards, and this dropped all the temps quite a bit, and they were running around the low 60’s.

As a tip to people out there with rigs, check your cards, and fan placement, and make sure the air is really flowing along the fins, not against them. Perhaps this is obvious, but I really had not even thought about it till then.
But one thing caught my eye with this, one card was only 39, and only had a fan of 50%. The others were all in the 60 range, with rans running between 60% and 80%. This was not an anomaly, looking at the numbers over a few days after the change, that one card was always much lower than the rest.
After looking at the rig, and doing some tests to confirm, it was obvious that the coolest one was the one at the end, where the stock fans could easily push the air out to the open. The others all get some back-pressure from trying to blow into the card beside them.
So, I started looking for better options for the mining rig. One thing I kind of liked was the “server rack” style. An enclosed case (reduce dust) with fans that pull the air across the cards. However, in my opinion this had a similar issue with the air flow trying to be along the length, which was not the best for these cards.
So looking at other options, they were all efforts to spread the cards out more. Either by going wider, or trying to go to two tiers.

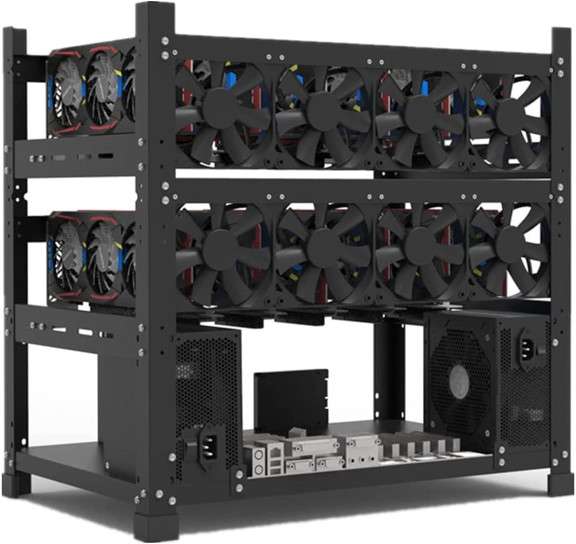
These would be better, but you would still get some back pressure, the fans were still in the wrong place, and these get EXPENSIVE. Also, if I was going to change the rig I wanted to increase my capacity to handle 12 GPUs, in which case I would back to a similar density as my current situation.
So that is when I decided to do the only rational thing somebody with questionable reasoning skills could come up with… spend more on building my own crazy contraption!
Behold, the “fire pit”!
...as I have decided to call it!
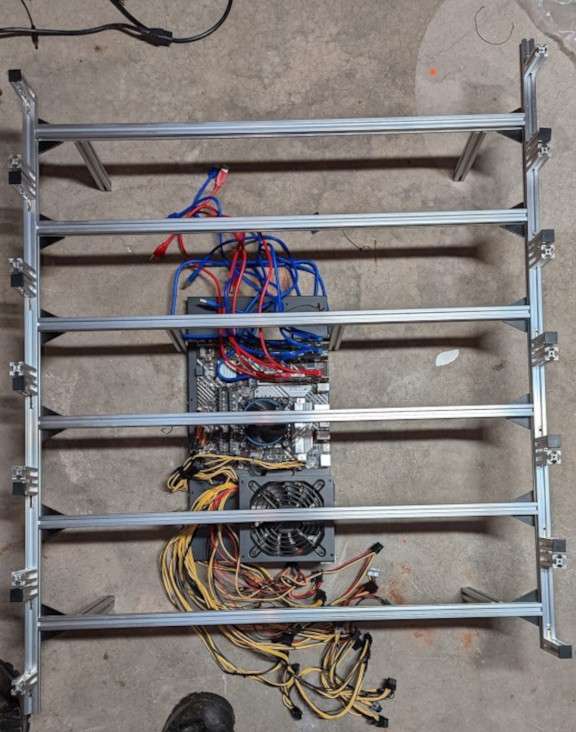
This thing is ridiculously huge at 39” X 33” X 11” (100cm X 84cm X 28cm). It is made of 2020 aluminum extrusion, so it also weighs a significant amount. But it is pretty rugged.
There is a lower level to hold the motherboard tray, which is the first thing I worked on. I wanted to make sure there was room for a second PSU to handle the additional GPUs I will (eventually) be adding. I also wanted the space to make sure the fans from the PSU and CPU had free airflow as well. So the motherboard was placed “centrally” under the cards, hence it on a lower level.
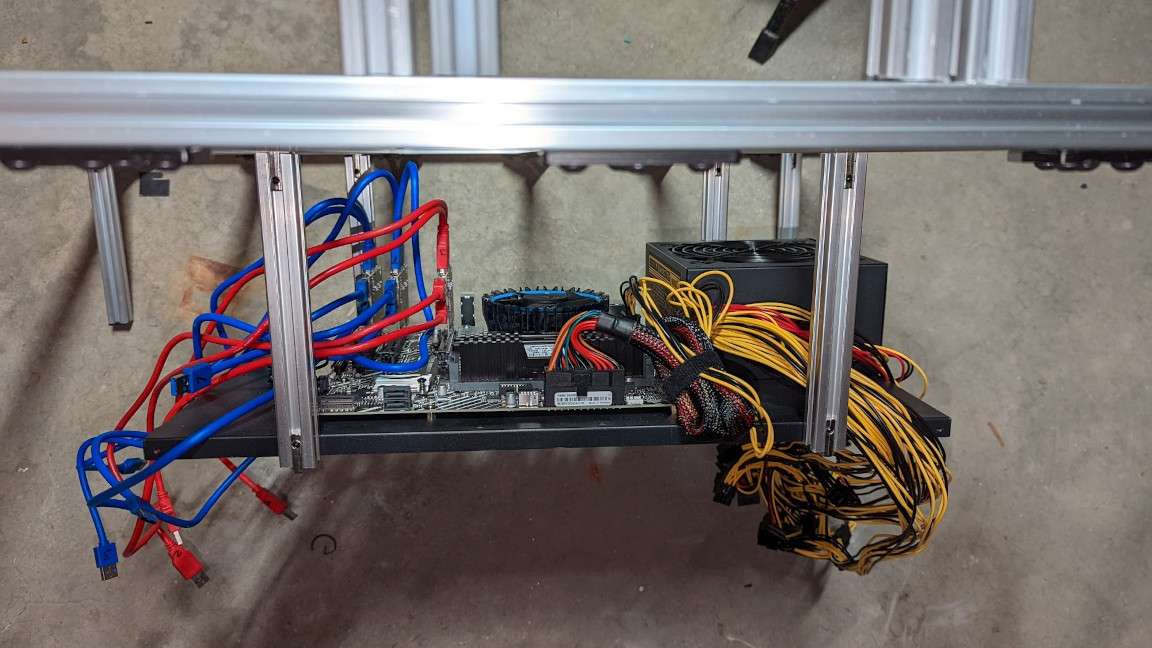
Now the GPUs are going to lay flat on each of the cross beams. This means the fans are pointing straight up, where heat apparently likes to go normally. This allows the stock fans to breath naturally. As a side benefit, by laying the backs on the 2020 aluminum it acts as a heat sink for the back of the cards, drawing heat away from the backs.
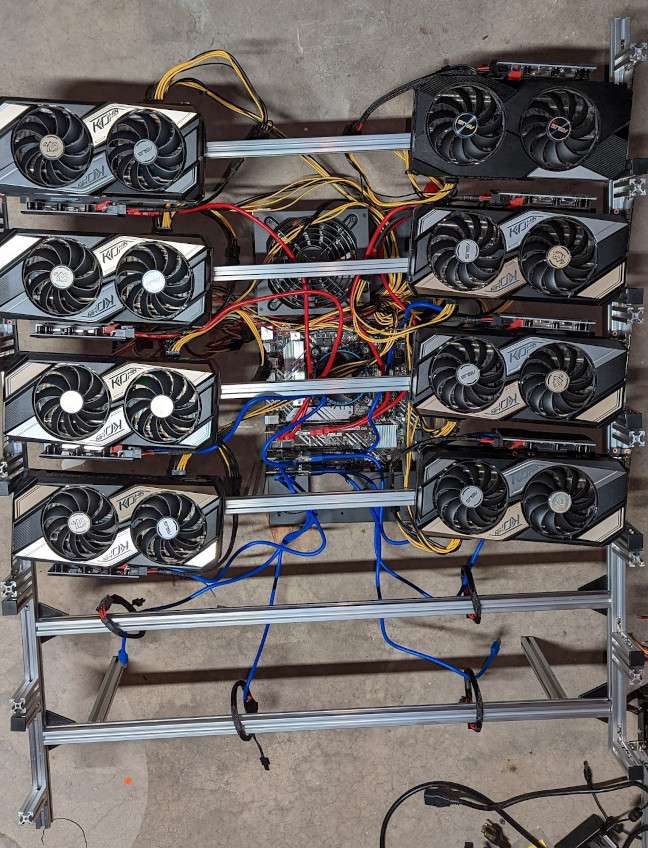
You can see at the end is space for 4 more cards, yet to be purchased, but nice to have the room.
Each card is held in by the bracket, I just used two stubs of 2020 to hold them in. Worked really well to hold them in place.
Before finishing I had all the wires professionally inspected, this is very important!
The results...
So, now the important part, the results were pretty amazing. Using exactly the same overclocking, every card is now at or under 55 degrees, and all the fans are running at 53% to 55%. I may play with some higher clock speeds later now they are running so much cooler.

I should also mention that the new configuration uses none of the fans that were on top or at the front of the old rig, so I am saving quite a bit of power on removing the 10 fans that I had, and still running cooler than before! Plus the fans on the cards themselves are not running as hard, so the efficiency of the cards has also improved. Originally they were averaging 400 to 405 KH/w, where as now I am up to 420 to 425w, about 5% per card with no overclocking changes.
Oh, and the reason for calling it the fire pit… it glows and gives off (some) heat… she is a pretty one!

My final summary….
I had a good time building this thing. I probably could have made it more compact, but I like the spacing, and it gives me the option to use longer GPUs if I want in the future.
I am lucky enough that I have space in the corner of my basement to keep it, without it getting into too much of my way.
I spent $217 on the materials for the frame, I could probably have picked some cheaper parts, but I tend to overengineer. This is quite a bit more than some of the cheap open frames, but they are quite fragile, where this thing is a tank. It is however cheaper than the server case style, though that comes with a special motherboard.
In full disclosure I did also spend an additional $126 on “unnecessary” items, like end caps, extra cables, and things to be ready for adding the next PSU. But I didn’t include them in the $217 above because it was not part of the like-for-like replacement.
Now I know many people will say that running in the low and sub 60s I probably didn’t need to do all this, and they are probably right, Ceteris Paribus. However, I justify in two ways.
First, there was no way I was going to get the four new GPUs on my old rig, so I needed to do something. Building a second rig was possibly an option, but then your wasting energy with a second MB setup, when what I had already had capacity that was unused.
Second, with Ethash (eventually) moving away from POW, I am going to have to find other algos to mine. If they are GPU intensive then that could require higher power, clocks, and therefor more heat generation. My old rig would have started to heat up in that situation. Also if I try to do some dual mining on these, to use some of the same underutilized resources, I may need that extra heat dissipation sooner rather than later.
So in both ways I feel this new rig future proofs me, so for me, in my situation, I feel it was a good choice…. Excessive.. but good.
What’s next?
As I mentioned, with this cooler running, I may try to tweak some overclocking to see if I can get more out of it without dropping efficiency.
I am also planning on switching to Linux so I can try dual mining. Since these are 8GB cards I can’t do a lot of the dual mining on windows which require a minimum of 10GB cards.
And as I mentioned, try getting 4 more cards to fully populate it. With GPU costs coming down, now might be a good time to see what I can get.


